The React Native Checkout SDK displays a payment sheet in your mobile app. Your server creates the checkout; the app uses a public merchant key to collect payment details and present the sheet.
This guide uses the alpha release @sumup/react-native-checkout@0.0.0-alpha.4. Its API can change between releases.
Integration
Before You Begin
Before you start, you need:
- A sandbox merchant account and the online test cards.
- A backend that creates checkouts for your orders and keeps secret API keys or OAuth client secrets on the server. Use an API key for your own merchant or OAuth when other merchants connect to your app.
- Your merchant’s public key, beginning with
sup_pk_, from Developer Settings(Opens in a new tab). - A React Native app with access to its native iOS and Android projects.
Use the public merchant key in SumUpProvider. Never put a secret key beginning with sup_sk_ or an OAuth client secret in your app, including build-time environment variables bundled with the app.
Create a Checkout
Initializing the SDK works by passing it a checkout_id. To create a checkout on your backend make the following request:
curl --request POST \
  --url https://api.sumup.com/v0.1/checkouts \
  --header "Authorization: Bearer $SUMUP_API_KEY" \
  --header 'Content-Type: application/json' \
  --data '{
    "checkout_reference": "44ea5096-b83f-46e1-9323-fe82a8cb7eb5",
    "currency": "SEK",
    "amount": 9.99,
    "description": "Order #1234",
    "merchant_code": "MXXXXXXX",
    "return_url": "https://example.com",
    "redirect_url": "https://sumup.com"
  }'
const checkout = await client.checkouts.create({
checkout_reference: "44ea5096-b83f-46e1-9323-fe82a8cb7eb5",
amount: 9.99,
currency: "SEK",
merchant_code: "MXXXXXXX",
description: "Order #1234",
return_url: "https://example.com",
redirect_url: "https://sumup.com",
});var checkout = await client.Checkouts.CreateAsync(new CheckoutCreateRequest
{
CheckoutReference = "44ea5096-b83f-46e1-9323-fe82a8cb7eb5",
Amount = 9.99f,
Currency = Currency.Sek,
MerchantCode = "MXXXXXXX",
Description = "Order #1234",
ReturnUrl = "https://example.com",
RedirectUrl = "https://sumup.com",
});var checkout = client.checkouts().createCheckout(
CheckoutCreateRequest.builder()
.checkoutReference("44ea5096-b83f-46e1-9323-fe82a8cb7eb5")
.amount(9.99f)
.currency(Currency.SEK)
.merchantCode("MXXXXXXX")
.description("Order #1234")
.returnUrl("https://example.com")
.redirectUrl("https://sumup.com")
.build()
);description := "Order #1234"
returnURL := "https://example.com"
redirectURL := "https://sumup.com"
checkout, err := client.Checkouts.Create(ctx, sumup.CheckoutsCreateParams{
CheckoutReference: "44ea5096-b83f-46e1-9323-fe82a8cb7eb5",
Amount: 9.99,
Currency: sumup.CurrencySEK,
MerchantCode: "MXXXXXXX",
Description: &description,
ReturnURL: &returnURL,
RedirectURL: &redirectURL,
})from sumup.checkouts.resource import CreateCheckoutBody
checkout = client.checkouts.create(
CreateCheckoutBody(
checkout_reference="44ea5096-b83f-46e1-9323-fe82a8cb7eb5",
amount=9.99,
currency="SEK",
merchant_code="MXXXXXXX",
description="Order #1234",
return_url="https://example.com",
redirect_url="https://sumup.com",
)
)let checkout = client
.checkouts()
.create(Some(sumup::resources::checkouts::CheckoutCreateRequest {
checkout_reference: "44ea5096-b83f-46e1-9323-fe82a8cb7eb5".into(),
amount: 9.99,
currency: sumup::resources::checkouts::Currency::SEK,
merchant_code: "MXXXXXXX".into(),
description: Some("Order #1234".into()),
return_url: Some("https://example.com".into()),
redirect_url: Some("https://sumup.com".into()),
customer_id: None,
purpose: None,
id: None,
status: None,
date: None,
valid_until: None,
transactions: None,
}))
.await?;$checkout = $sumup->checkouts->create([
'checkout_reference' => '44ea5096-b83f-46e1-9323-fe82a8cb7eb5',
'currency' => 'SEK',
'amount' => 9.99,
'description' => 'Order #1234',
'merchant_code' => 'MXXXXXXX',
'return_url' => 'https://example.com',
'redirect_url' => 'https://sumup.com',
]);Return only the checkout ID and other non-secret order details to the app. Set the amount, currency, and merchant on your server from the stored order, rather than accepting them from the mobile app.
Set up SDK
Install the published SDK and its WebView dependency:
npm install @sumup/react-native-checkout@0.0.0-alpha.4 react-native-webviewFor iOS, install the native modules:
cd ios
pod install
The examples below set language: "en". To detect the device language instead, install react-native-localization and omit language. The SDK supports en and sv.
Wrap your payment screen in SumUpProvider. Replace the public-key placeholder with the public key for the merchant that owns the checkout:
import { SumUpProvider } from "@sumup/react-native-checkout";
import { PaymentScreen } from "./PaymentScreen";

type AppProps = { checkoutId: string };

export default function App({ checkoutId }: AppProps) {
  return (
    <SumUpProvider publicKey="sup_pk_YOUR_PUBLIC_KEY">
      <PaymentScreen checkoutId={checkoutId} />
    </SumUpProvider>
  );
}
Obtain a fresh checkoutId from your backend for the order being paid. Do not reuse a checkout from a completed order.
Provide Payment Details
Create PaymentScreen.tsx with the following component. It initializes the sheet with the checkout ID from your server and enables the payment button only after initialization succeeds:
import { useEffect, useState } from "react";
import { Alert, Button, View } from "react-native";
import { useSumUp } from "@sumup/react-native-checkout";

type PaymentScreenProps = { checkoutId: string };

export function PaymentScreen({ checkoutId }: PaymentScreenProps) {
  const { initPaymentSheet, presentPaymentSheet } = useSumUp();
  const [ready, setReady] = useState(false);
  const [presenting, setPresenting] = useState(false);

  useEffect(() => {
    let active = true;
    setReady(false);

    async function initialize() {
      try {
        const { error } = await initPaymentSheet({ checkoutId, language: "en" });
        if (!active) return;
        if (error) {
          Alert.alert("Could not prepare payment", error.status === "failure" ? error.message : "Cancelled");
          return;
        }
        setReady(true);
      } catch {
        if (active) Alert.alert("Could not prepare payment", "Please try again.");
      }
    }

    void initialize();
    return () => { active = false; };
  }, [checkoutId, initPaymentSheet]);

  async function pay() {
    setPresenting(true);
    try {
      const { error } = await presentPaymentSheet();
      if (error) {
        if (error.status === "failure") Alert.alert("Payment failed", error.message);
        return;
      }
      setReady(false);
      Alert.alert("Payment submitted", "Check your order status for confirmation.");
    } catch {
      Alert.alert("Payment result unavailable", "Check your order status before trying another payment.");
    } finally {
      setPresenting(false);
    }
  }

  return (
    <View>
      <Button title="Pay" disabled={!ready || presenting} onPress={pay} />
    </View>
  );
}
Show Payment Sheet
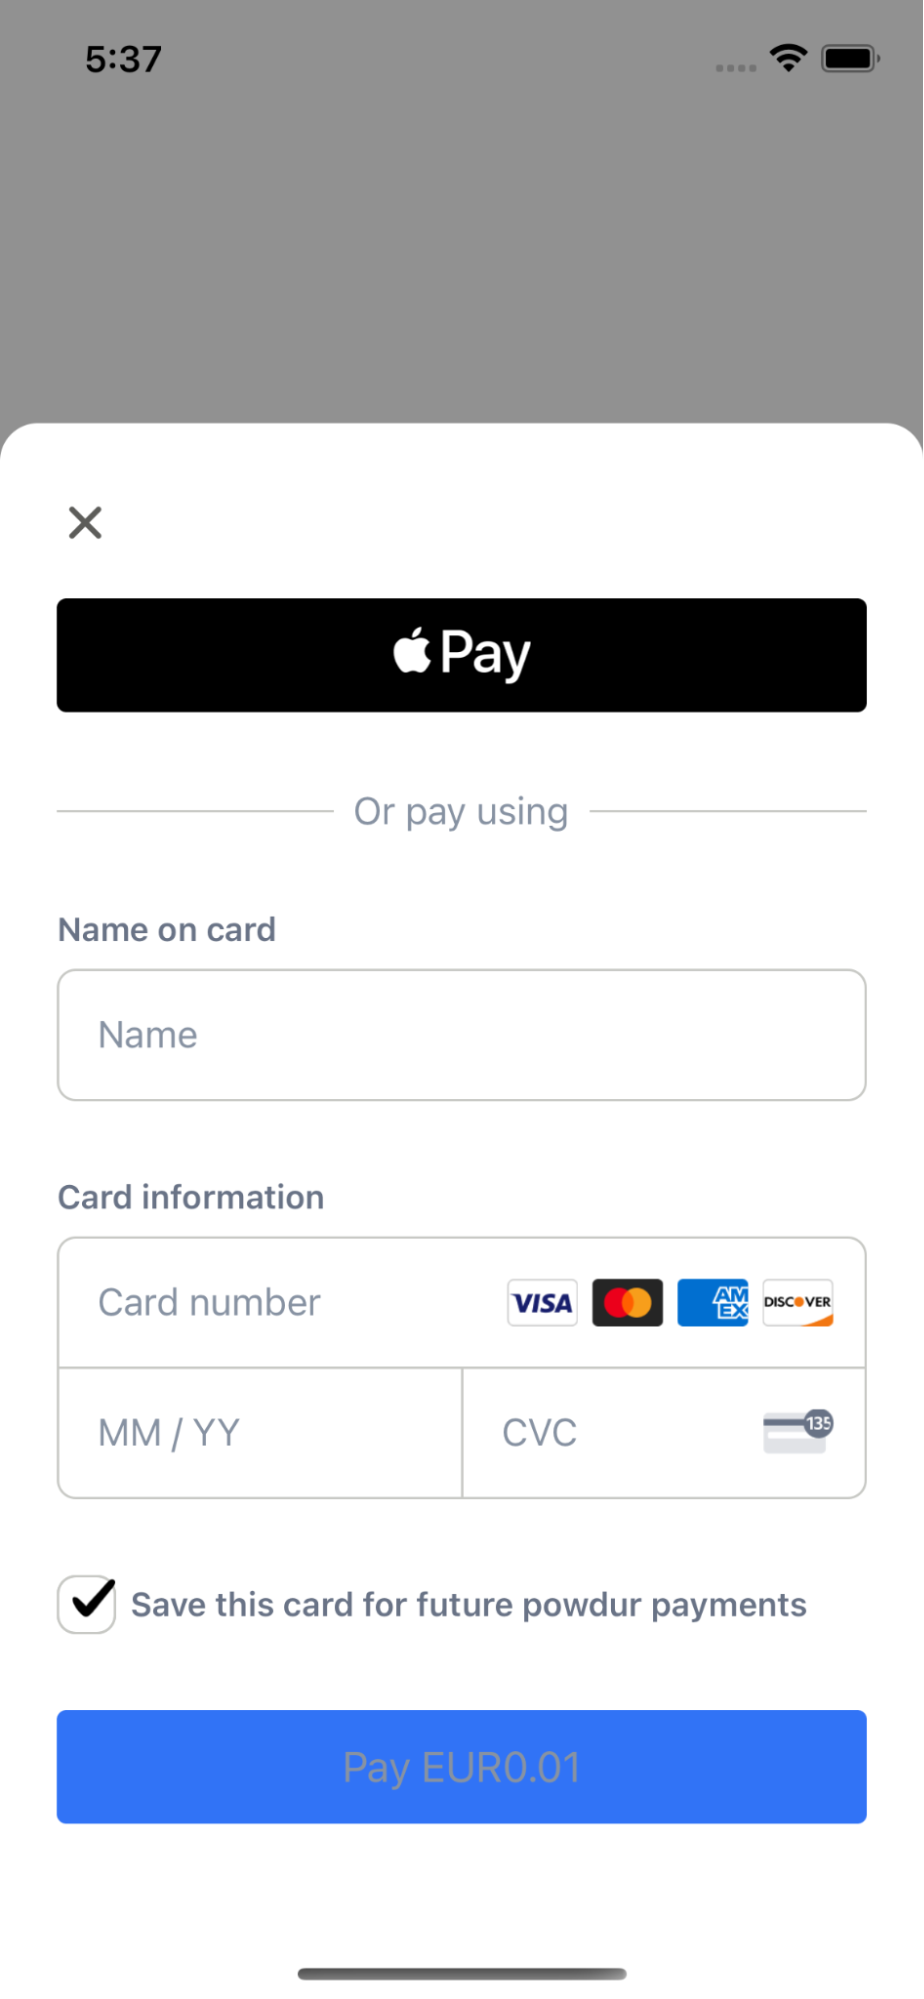
Run the app, open your payment screen with a fresh sandbox checkout, and select Pay. Enter an online test card and complete any authentication challenge.
The sheet can complete, fail, or be cancelled. The example handles both returned SDK errors and rejected promises. Your backend must retrieve the checkout and verify its final status before marking the order paid. See online payment webhooks for server notifications.
Optional Integrations
Save a Card for Future Usage
To save a card, create a customer and a checkout with purpose: "SETUP_RECURRING_PAYMENT" and that customer’s customer_id on your server. Follow the saved-card guide for the backend flow and permission requirements.
Use initSaveCardSheet and presentSaveCardSheet from useSumUp() in a component under SumUpProvider:
const { initSaveCardSheet, presentSaveCardSheet } = useSumUp();

async function saveCard(checkoutId: string, customerId: string) {
  const initialized = await initSaveCardSheet({ checkoutId, customerId, language: "en" });
  if (initialized.error) return;

  const result = await presentSaveCardSheet();
  if (result.error) return;
  // Ask your backend to retrieve the saved payment instrument for this customer.
}
Handle returned errors and rejected promises as in the payment example. Keep saved-card tokens and subsequent payment requests on your server.
Use Google Pay
Enable Google Pay in your app’s AndroidManifest.xml, inside <application>:
<meta-data
  android:name="com.google.android.gms.wallet.api.enabled"
  android:value="true" />
Pass the Google Pay option when initializing the sheet:
await initPaymentSheet({
  checkoutId,
  language: "en",
  googlePay: { isProductionEnvironment: false },
});
Keep the test environment enabled while developing. Complete Google’s Android setup(Opens in a new tab) before enabling production payments.
Use Apple Pay
Register for an Apple Merchant ID
Register an Apple merchant identifier, configure your app’s Apple Pay capability and certificates, and select that identifier in Xcode. Follow Apple’s Apple Pay setup(Opens in a new tab).
Pass the matching identifier when initializing the sheet:
await initPaymentSheet({
  checkoutId,
  language: "en",
  applePay: { merchantIdentifier: "merchant.com.example.app" },
});
Test on a supported device with the merchant and wallet configuration you will use. Confirm the final checkout status on your server for wallet payments as well as card payments.