React Native Payment SDK
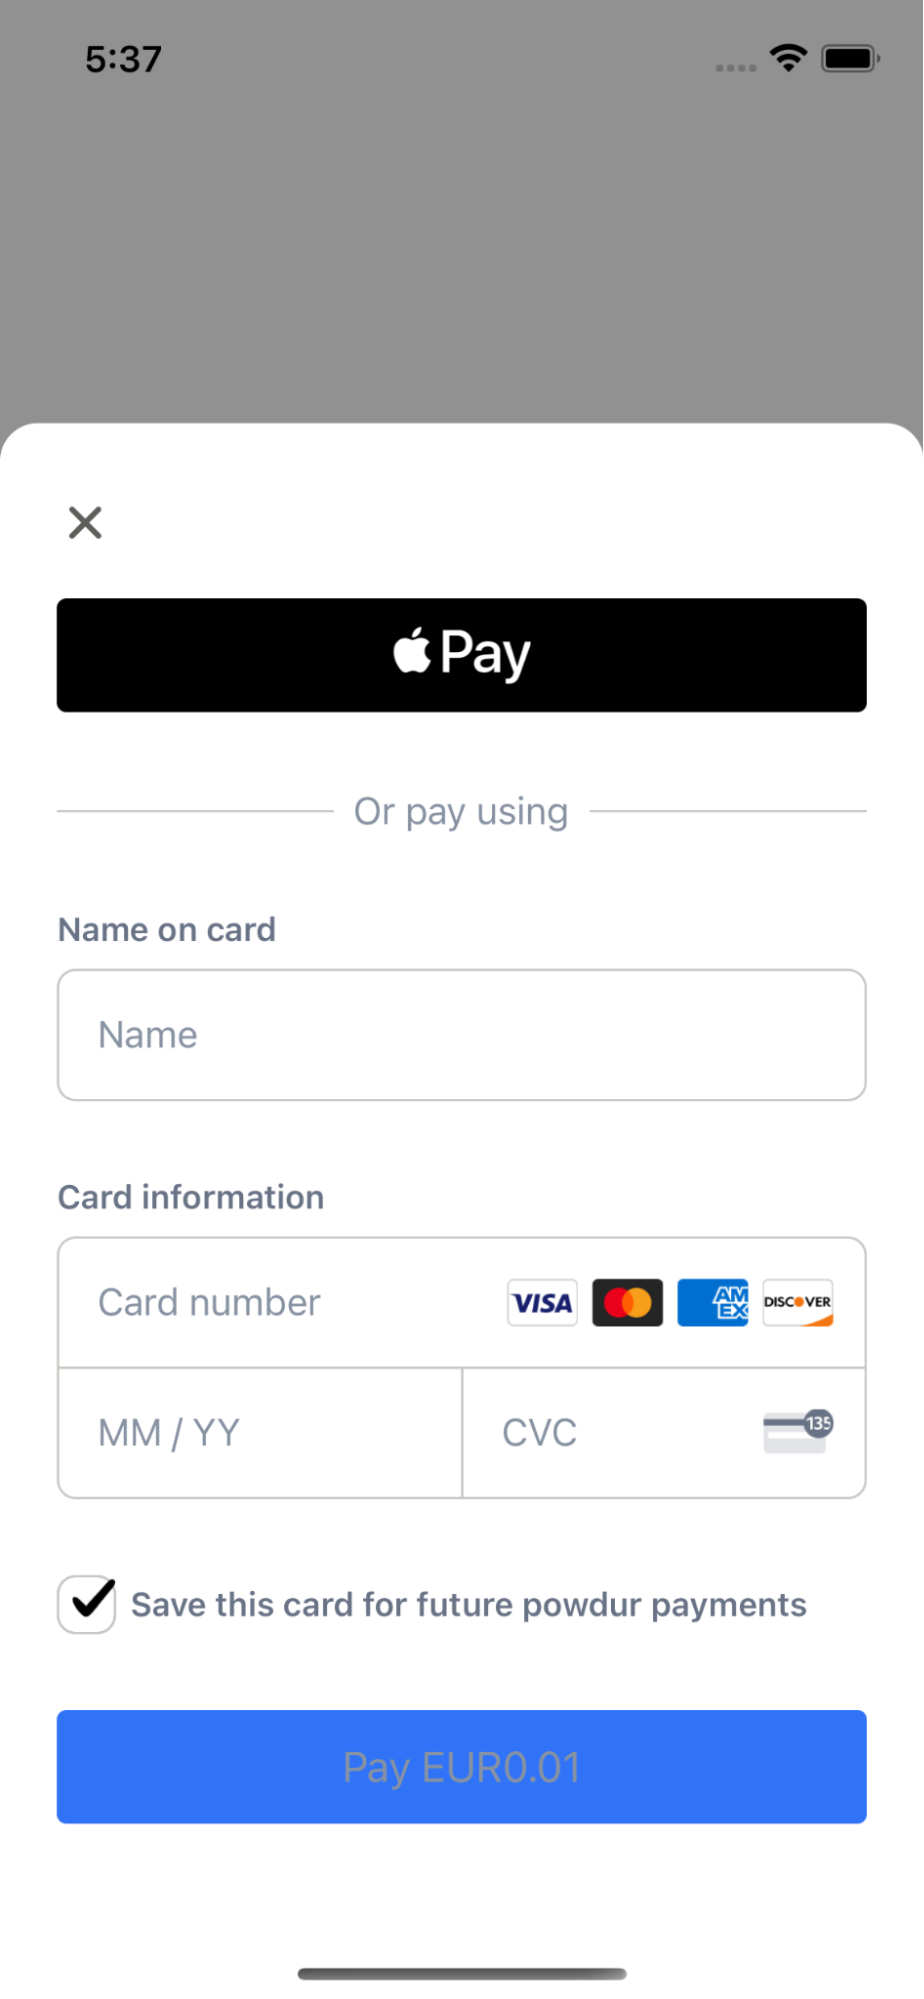
SumUp’s React Native Payment SDK provides a payment sheet that is displayed on top of your app. It collects user payment details, confirms a payment, and saves a card for future usage. Moreover, it allows a user to use Apple Pay or Google Pay to process payments.
Integration
Section titled “Integration”Before you begin
Section titled “Before you begin”Here are the things that you need in order to complete the steps in this guide:
- You have a merchant account with SumUp and have already filled in your account details.
- For a test account reach out to our support team through this contact form.
- You have registered your client application with SumUp.
- You have a valid access token obtained via the Authorization code flow.
- The restricted
payment_instrumentsscope is enabled for your client application. If it isn’t enabled, contact us and request it. - Review how to create a single payment here.
Create a checkout
Section titled “Create a checkout”Initializing the SDK works by passing it a checkout_id. To create a checkout on your backend make the following request:
curl --request POST \--url https://api.sumup.com/v0.1/checkouts \--header "Authorization: Bearer $SUMUP_API_KEY" \--header 'Content-Type: application/json' \--data '{"checkout_reference": "44ea5096-b83f-46e1-9323-fe82a8cb7eb5","currency": "SEK","amount": 9.99,"description": "Order #1234","merchant_code": "MXXXXXXX","return_url": "https://example.com","redirect_url": "https://sumup.com"}'The SDK will process the checkout once a customer provides payment details. If payment details aren’t passed an error will be received.
Set up SDK
Section titled “Set up SDK”Install the npm module by one of the following commands:
npm i sumup-react-native-alphanpm i react-native-webviewyarn add sumup-react-native-alphayarn add react-native-webviewYou need to install react-native-localization to automatically detect the user system language.
npm i react-native-localizationyarn add react-native-localizationIf you don’t need it, please provide the language field in the initPaymentSheet function.
await initPaymentSheet({ checkoutId, language: 'en',});Next, install the native modules.
cd iospod installSDK should be initialized by wrapping your payment screen into SumUpProvider. This component requires an apiKey that can be created here.
import { SumUpProvider } from 'sumup-react-native-alpha';
export default function App() { return ( <SumUpProvider apiKey="sup_sk_..."> <Screen /> </SumUpProvider> );}Provide payment details
Section titled “Provide payment details”Before showing the payment sheet, it needs to be initialized. Call initPaymentSheet with the parameters like in example below:
import React, { useEffect } from "react";import { View, Alert } from "react-native";import { useSumUp } from "sumup-react-native-alpha";
export default function MainScreen() { const { initPaymentSheet } = useSumUp();
const initSumUpPaymentSheet = async () => { const { error } = await initPaymentSheet({ checkoutId: "...", customerId: "...", language: "en", // en or sv are supported });
if (error) { Alert.alert( error.status, error.status === "failure" ? error.message : undefined ); } else { Alert.alert("Payment Sheet was configured"); } };
useEffect(() => { initSumUpPaymentSheet(); }, []);
...Required fields for initPaymentSheet:
checkoutId- described in section Create a checkout.
Optional:
customerId- used for saving cards for future usage.language- English and Sweden are supported (if undefined, react-native-localization will be used to check user device language).
Show Payment Sheet
Section titled “Show Payment Sheet”After initialization a payment sheet can be shown. When a user presses a button, you can show it by calling presentPaymentSheet(). After a user completes a payment, this function will return a callback. If any errors take place, the callback will contain an error field with the details.
...
const showPaymentSheet = async () => { const { error } = await presentPaymentSheet();
if (error) { Alert.alert( error.status, error.status === "failure" ? error.message : undefined ); } else { Alert.alert("Payment successfully was processed"); } };
return ( <View style={{ justifyContent: "center", alignItems: "center" }}> <Button title="Present Payment Sheet!" onPress={showPaymentSheet} /> </View> );}Optional Integrations
Section titled “Optional Integrations”Save a card for future usage
Section titled “Save a card for future usage”To save a card for future usage, a customer should be created. It can be achieved by making the following request:
curl -L -X POST 'https://api.sumup.com/v0.1/customers' \ -H 'Content-Type: application/json' \ -H 'Accept: application/json' \ -H "Authorization: Bearer $SUMUP_API_KEY" \ --data-raw '{ "customer_id": "831ff8d4cd5958ab5670", "personal_details": { "first_name": "John", "last_name": "Doe", "email": "user@example.com", "phone": "+491635559723", "birthdate": "1993-12-31", "address": { "city": "Berlin", "country": "DE", "line1": "Sample street", "line2": "ap. 5", "postal_code": "10115", "state": "Berlin" } } }'For more information on saving a customer refer to this guide.
To use the newly created customer, create a checkout by passing the customer_id and provide it to the initPaymentSheet function.
await initPaymentSheet({ // ... customerId: '...',});Use Google Pay
Section titled “Use Google Pay”To use Google Pay, first enable the Google Pay API by adding the following to the application tag of your AndroidManifest.xml:
<application> ... <meta-data android:name="com.google.android.gms.wallet.api.enabled" android:value="true" /></application>For more details, see Google Pay’s Set up Google Pay API for Android.
Then provide googlePay object to the initPaymentSheet to initialize.
await initPaymentSheet({ // ... googlePay: { isProductionEnvironment: false, },});Use Apple Pay
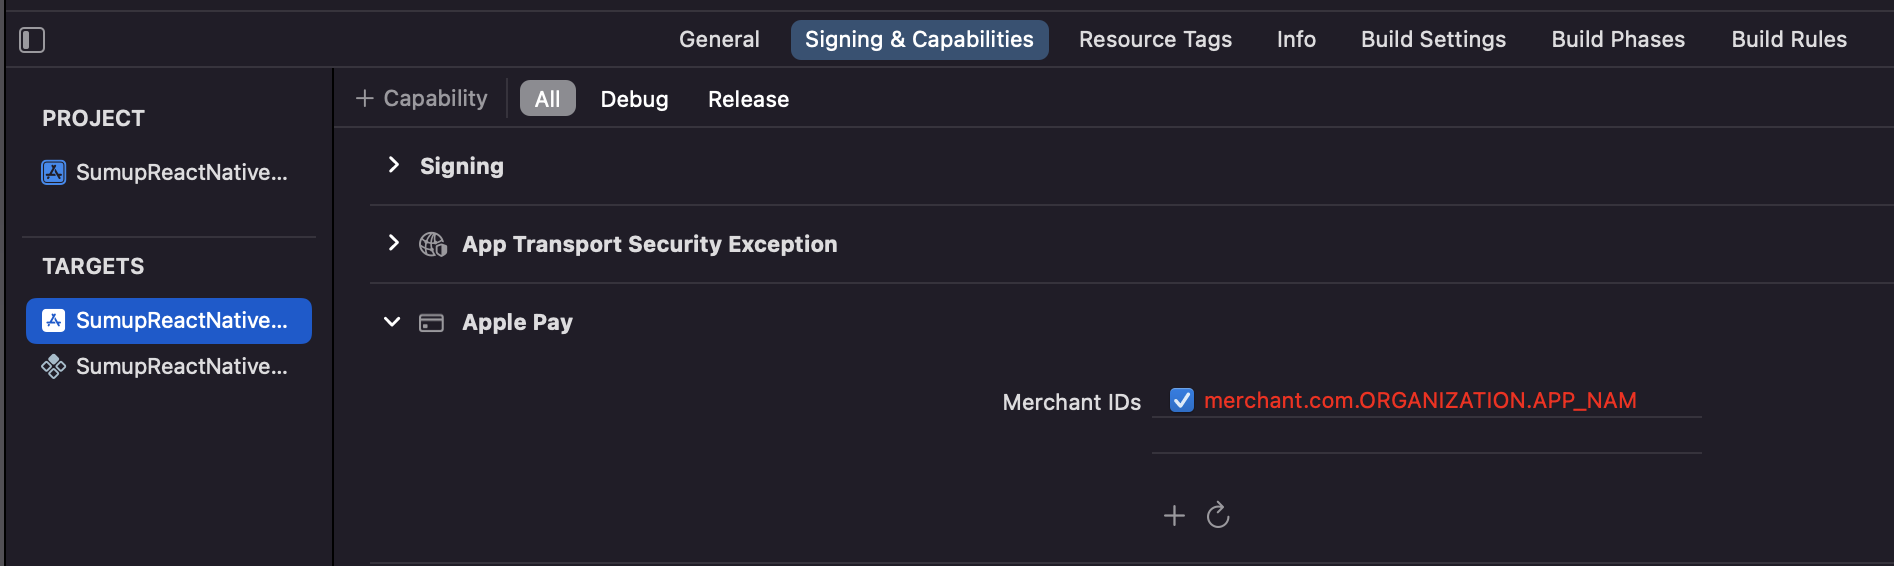
Section titled “Use Apple Pay”Register for an Apple Merchant ID
Section titled “Register for an Apple Merchant ID”Obtain an Apple Merchant ID by registering for a new identifier on the Apple Developer website. Fill out the form with a description and identifier. Your description is for your own records and you can modify it in the future.
Create a new Apple Pay certificate - needs to be implemented.
To enable Apple Pay in Xcode:
- Open your target settings
- Go to Signing & Capabilities tab
- Click on Add Capability button
- Select your merchant identifier
Then provide an applePay object in initPaymentSheet to initialize.
await initPaymentSheet({ // ... applePay: { merchantIdentifier: 'merchant.com.{{YOUR_APP_NAME}}', label: 'Pay', },});