Accept payments with WooCommerce
If you already have a WordPress website and would like to complete it with accepting payments, you can do so with the SumUp Payment Gateway for WooCommerce plugin. It will allow you to take payments in your online store with an easy and quick integration without any coding required.
The plugin is a lightweight integration option enabling your customizations and providing your customers the convenience of securely buying products from your website without being redirected to other pages. It accepts all major card schemes like VISA, MasterCard, American Express, Diners, Discover and JCB.
Transactions are processed through the SumUp payment platform allowing you to track your transaction history through the SumUp Dashboard.
If you're just getting started with SumUp review our allowed businesses list prior to signing up.
Go to plugin pageRequirements
To get started you will need an active SumUp account. As an authorized Payment Institution by the Central Bank of Ireland, SumUp will require certain documents to verify you as the individual and owner of the business you're registering with. Please make sure your business model is supported by SumUp, according to our allowed businesses article.
Installing the plugin
Automatic Installation
The automatic installation is the easiest option, as WordPress handles the file transfer and you don't need to leave your web browser.
- Install the plugin via the Plugins section in the WordPress Dashboard
- Click on Add new and search for SumUp Payment Gateway for WooCommerce
- Then click on the Install Now button
- Click Activate to active the plugin
Manual Installation
The manual installation method involves downloading our plugin and uploading it to your web server via your favorite FTP application. The WordPress codex contains instructions on how to do this.
Before setting up the plugin you must create your client credentials. They will be used afterwards to configure the plugins setup.
Integration Options
For plugin versions above 2.5 both a simple and advanced integration flow are available. If you are using a plugin version below 2.5, follow the steps in our advanced integration guide.
Simple Integration
This integration option is available to plugin versions above 2.5.
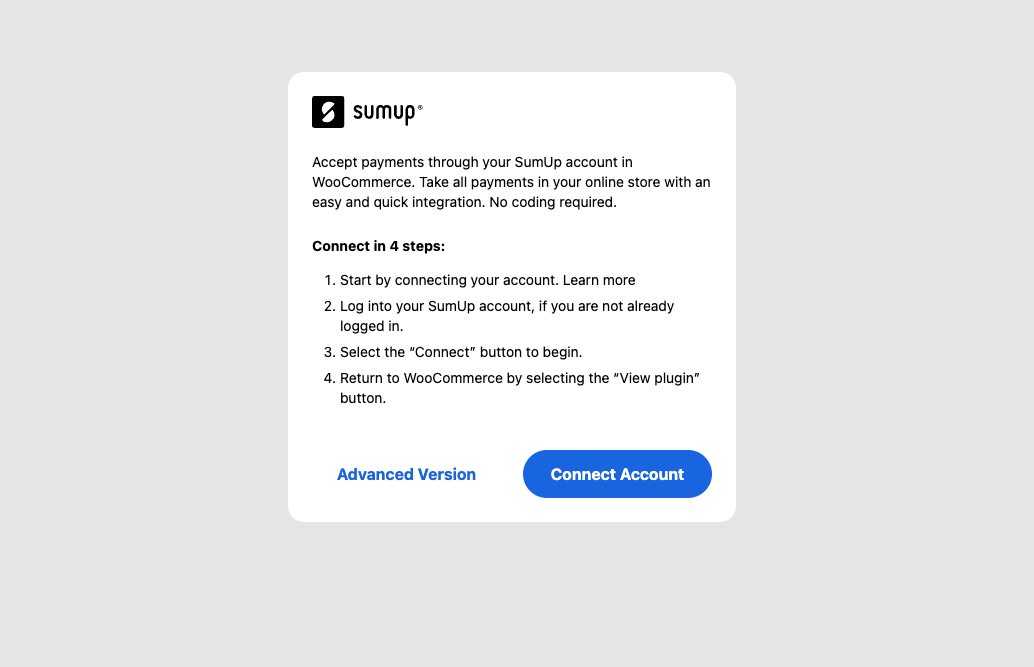
- Click on the Connect account button to initiate the lightweight integration flow. You will be redirected to your Online Payments settings in the SumUp Dashboard
- In your SumUp Dashboard, click on Start setup to begin the creation of your production API keys
Once the flow is initiated, we will take care of generating live api keys for your SumUp account. When the flow completes successfully, they will become available to your WordPress shop.
You can now begin accepting payments through SumUp on your WordPress shop.

Advanced Integration
- Once the plugin is activated, click on Advanced version option
- Create your API Key
- Enter your credentials from your SumUp account (API Key, email and merchant code) and configure any settings as needed
Additional configuration
- Enable the SumUp Payment Gateway
- Apply custom title of the payment method, visible by your customers
- Apply an optional payment method description, visible by your customers
- Apply your shop currency corresponding to the one set in your SumUp account
- Requires ZIP code from your customers. Mandatory for US merchants
- We recommend enabling the logging option for better troubleshooting should any issues occur (Logs can be accessed in WooCommerce/Status/Logs)
- Choose between popup or embedded payment form with the "Open Payment in modal?" option
Update your website
Before you begin accepting payments through SumUp, your website should display the following information:
- Business & product information
- Delivery, cancellation & return/refund policy
- Payment & billing process
- All prices must have the respective currency prefix
- Privacy policy
- Security policy
Configuration for legacy plugin (version older than 2.5)
Create your client credentials
To create client credentials you must have an active SumUp account and have already filled in your account details. It is important that your account has successfully completed the onboarding process and you have requested the payments scope activation. If you don't have the payments scope activated, message us for assistance.
Create your credentials here.
Once you ensure you've met the above requirements, you can proceed with our Register application guide to set up your client credentials. In that page you find information on how to register an app and your client credentials which are necessary for setting up the plugin in your Wordpress account.
Plugin Configuration
Now that you have created your client credentials, you can proceed with configuring the SumUp WooCommerce plugin. Before you begin make sure you have the WooCommerce plugin installed.
Once in the WordPress Dashboard, navigate to the Plugins section and select Settings under the SumUp Woocommerce plugin. Descriptions of the setting page fields can be found below:
- Enable the SumUp Payment Gateway
- Apply custom title of the payment method, visible by your customers
- Apply an optional payment method description, visible by your customers
- Apply your shop currency corresponding to the one set in your SumUp account
- Client ID and Client Secret of your application. Both are located in the JSON file you created in the Create your client credentials step, in the following key-value pair:
{
  "id": "CCCFAXYD",
  "name": "My Online Store Name",
  "client_id": "fOcmczrYtYMJ7Li5GjMLLcUeC9dN",
  "client_secret": "717bd571b54297494cd7a79b491e8f2c1da6189c4cc2d3481380e8366eef539c",
  "application_type": "web",
  "redirect_uris": ["https://mywebsite.com/callback"]
}
- The email address you sign into your SumUp merchant account with
- The merchant code associated to your SumUp account
- Requires ZIP code from your customers. Mandatory for US merchants
- We recommend enabling this option for better troubleshooting should any issues occur (Logs can be accessed in WooCommerce/Status/Logs)